Camp Oatmeal and Toppings Bar for a Crowd

For our last camping trip of the summer, we went to Yosemite with a large group — roughly 40 people. Breakfasts and dinners were group affairs, divvied up so that each family basically only had to cook part of one meal. We teamed up with a couple other families to put on the first breakfast: oatmeal with an elaborate toppings bar, plus sausages (pork and veggie) and scrambled eggs on the side.

I spent a long time thinking (OK, obsessing) about the best way to prepare oatmeal for a crowd in a camping environment. Steel cut oats? Overnight oats? Old fashioned rolled oats? Quick cooking oats? Precook or make on site? There are a few challenges to consider:

  • Cooler space is limited, so it might be hard to fit a large quantity of precooked oatmeal.
  • Cooked oatmeal tends to thicken over time, so reheated texture might be unpredictable.
  • There’s no telling how much oatmeal people will actually eat, so if you precook a large batch, you might end up with too much left over.
  • Temperature control on a camp stove is notoriously difficult. Our burners seem to have three settings: full blast, almost full blast, and oops it went out. That makes it hard to simmer a large pot of oatmeal for very long without starting to burn on the bottom.

For all of those reasons, I decided to bring uncooked quick oats and make them in medium-size batches on site. Quick oats only take a minute or so to cook, so by the time you bring them to a boil, they’re pretty much done already. Doing them in batches helped minimize leftovers because I could cook more as needed. And while the texture of quick oats is certainly not as nice as traditional oats, a well appointed toppings bar more than makes up for it.

Speaking of toppings: In general, 1-2 cups of each was plenty for our group. Some double as good camping snacks (e.g., blueberries, dried cranberries, granola), and many need no refrigeration, so having leftovers is not so bad. The most popular topping was probably the whipped cream, so I’d call that one a must-have.

And here’s a surprising fact: While oatmeal is made from oats, which contain no gluten, it is not necessarily gluten free! Many oats are processed in the same facility as other grains such as wheat, barley and rye, which means they can be contaminated by gluten-containing particles. That’s particularly important when cooking for a large group with various food restrictions. Bob’s Red Mill makes all sorts of gluten free oats (quick cooking, old fashioned rolled, steel cut, etc.) that have been processed in a dedicated gluten free facility and tested to ensure they are safe for people with celiac disease or gluten intolerance. (Not a promotion, just a trusted brand that seems relatively easy to find in stores.)

Serves 30-40

Ingredients

28-ounce package quick cooking oats (If you are serving oatmeal with other breakfast items, like sausage, bacon or eggs, 28 ounces is sufficient. If oatmeal is the only element of the meal, you may want to double it.)
18 cups water
1 tsp salt

Topping ideas

toasted pecan pieces
slivered almonds
dried cranberries
raisins
granola
freeze-dried strawberries
mini chocolate chips
rainbow sprinkles
shredded coconut
fresh berries
bananas
brown sugar
ground cinnamon
honey
maple syrup
apple sauce
whipped cream
milk
soy milk
almond milk

Cook oatmeal in batches (4-5 cups of oats at a time) according to package directions (1 part oats to 2 parts water, pinch of salt per serving). Set out toppings in bowls with serving spoons (as needed). Serve immediately.

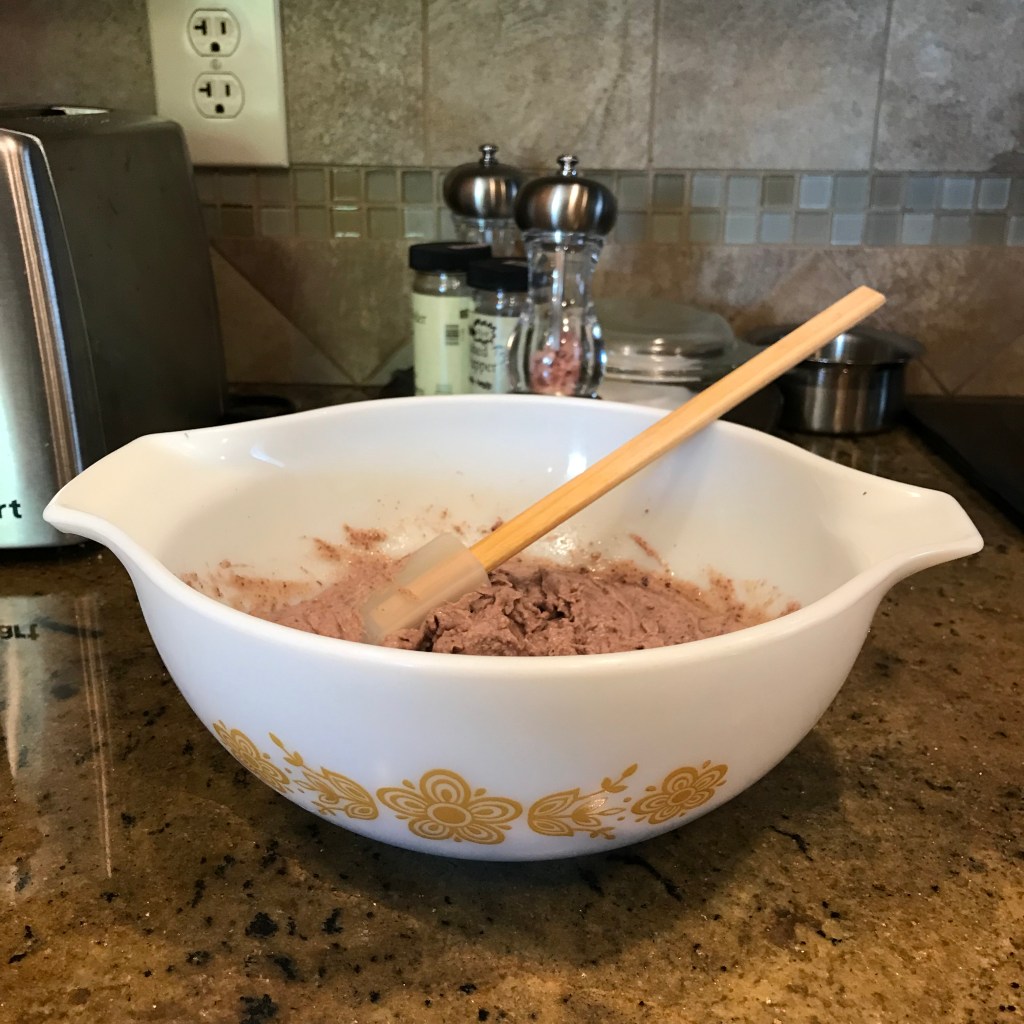
Pictured: Corelle Butterfly Gold Bowls

Oatmeal-fueled kids enjoying the Merced River in beautiful Yosemite Valley

Any Bean Hummus with Miso

One of my favorite things to do is cook with pantry staples — I love it when all the ingredients I need are already in my kitchen. So recently when I was in the mood for hummus, I decided to make my own. Since I didn’t have any chickpeas, I used black beans instead. Also I’ve been experimenting with making my own miso (and using it to add umami to lots of different dishes), so I threw that in too. The hummus turned out great, and I’m convinced the recipe would work well with just about any type of bean.

Admittedly, miso and tahini may not be staples for most people, but they are great to have on hand, if only to make more hummus!

Ingredients

1 can beans, drained and rinsed
3 tbsp tahini
2 cloves garlic
3 tbsp lemon juice (about one lemon)
2 tbsp olive oil
1 tbsp white miso
1/2 tsp cumin
salt

In a medium bowl, combine beans, tahini, garlic, lemon juice, 2 tbsp olive oil, miso and cumin. Use an immersion blender (or food processor) to puree until smooth. Add more oil or a little water if needed for desired consistency. Add salt to taste.

Pictured: Pyrex Butterfly Gold 443 Cinderella Mixing Bowl, Corning Ware Wheat W-43-B Petite Pan, Corning Ware Wheat W-1-B Casserole

Hummus with Sweet and Spicy Roasted Peppers

You could say that I’m a little obsessed with Pyrex divided dishes. So recently when I was in the mood to make hummus for an NBA Finals party (Go Warriors!), I knew I wanted to make two different flavors — and exactly what dish to serve them in. Incidentally, since the divided dish was originally designed to hold packaged foods, it’s not surprising that two cans of garbanzo beans make enough hummus to fill each side of the dish just about perfectly.

My starting point for this recipe was Cooking Classy’s Roasted Red Pepper Hummus. I wanted to make sure my two hummus flavors would be different colors, though, so I used yellow bell peppers instead of red. The yellow ones have a milder flavor, too, so they add a nice sweetness without overpowering. The red fresno chiles provide a good color contrast plus a little extra kick.

Ingredients

2 yellow bell peppers, cored, seeded and sliced into quarters lengthwise
4 red fresno chili peppers, cored, seeded and sliced in half lengthwise
2 15-oz cans garbanzo beans, drained and rinsed
6 tbsp fresh lemon juice (about 2 lemons)
6 tbsp tahini
4 cloves garlic
1 tsp salt
1/2 tsp cumin
4 tbsp olive oil

Set your oven to “broil” and place the top rack about 4-5 inches below the broiler. Arrange the sliced peppers on a baking sheet and roast until charred, about 10-15 minutes.

Transfer each variety of peppers to separate Ziploc bags. Seal and let rest until cool enough to handle, about 10 minutes (this helps the skin separate from the flesh). Peel the peppers and divide into two groups: 1) just bell peppers, and 2) fresno chiles plus 2-3 bell pepper slices. Chop each group into half-inch pieces and set aside.

Combine the garbanzo beans, lemon juice, tahini, garlic, salt, cumin and olive oil. Pulse in a food processor or with an immersion blender until mostly pureed.

Divide the garbanzo mixture in half. To the first half, add pepper group 1 (bell peppers) plus 1-2 tsp water. Pulse until fully pureed. Test for desired consistency and add water in small amounts if needed. Add salt to taste, and set aside.

Repeat with the second half of the garbanzo mixture and pepper group 2 (fresno chiles and bell peppers).

Refrigerate for at least 1 hour before serving. Optional garnishes: chopped parsley, red pepper flakes, and/or a drizzle of olive oil.

Pictured: Pyrex Royal Wheat 063 Divided Dish, Pyrex Butterfly Gold 403 Round Mixing Bowl, Corning Ware Grab-It Bowl (x2), Hazel Atlas Crisscross Orange Reamer

Easter Dinner 2018

My Easter meal planning this year was inspired by two things: 1) the desire to use my Pyrex pink daisy divided dish (because pink and daisies are so Easter), and 2) the beautiful rainbow carrots and red fingerling potatoes we got in our produce box this week. The divided dish will be perfect for a berry and whipped cream dessert, and the carrots and potatoes will be roasted and tossed in a carrot top pesto.

For everything else, I’ve pulled together the most Easter-y pastels I could find in my collection: lime green, gold and sunny orange.

Rough menu:

  • Spice rubbed rotisserie chicken (recipe)
  • Roasted carrots and potatoes with carrot top pesto (recipe)
  • Brussels sprout quiche (recipe)
  • Simple salad with kumquat dressing (recipe)
  • Parker House rolls
  • Assorted berries with fresh whipped cream


Pictured: Pyrex Pink Daisy Divided Dish, Pyrex Lime 024 Round Casserole, Pyrex Butterfly Gold 404 Round Mixing Bowl, Pyrex Lime 232 Oblong Open Baker, Corning Ware Butterscotch Round B-2 1/2-B Saucepan, Corning Ware French White F-3-B Quiche Dish, Fire King Gravy Boat

Spring Onion, Barley and White Bean Soup

What do you do when you have spring onions from the farmers market and a big bag of arugula from your neighbor’s garden? Well, I start thinking about soup, the swirl of greens in a hearty mix of beans and barley, and bacon. It’s hard to go wrong with ingredients like that! The soup is a meal in itself but would also be good served with garlic bread or a grilled cheese sandwich.

Recipe very loosely adapted from The New York TimesBarley and Spring Onion Soup With Fava Beans.

Serves 6

Ingredients

3 oz bacon, diced
1/2 lb spring onions, sliced (bulbs and stems)
2 garlic cloves, minced
6 cups low-sodium chicken broth
1 bay leaf
1 tsp dried thyme
2 cans cannellini beans, drained and rinsed
1/2 cup barley
5 oz arugula (or baby spinach)
salt
pepper

In a large pot over medium heat, saute the bacon until the fat renders and the edges start to brown. Add the spring onions and cook until they are slightly softened. Add the garlic and cook until fragrant, about 1 minute.

Add the chicken broth, bay leaf, thyme, beans and barley. Bring to a boil, then reduce heat and simmer until barley is tender, about 1 hour.

Stir in the arugula and cook until wilted and the soup starts to simmer again, about 3 minutes. Add salt and pepper to taste, and serve.

Pictured: Corning Ware Spice O’ Life A-5-B Saucepot, Pyrex Butterfly Gold 402 Round Mixing Bowl, Pyrex Spring Blossom 401 Round Mixing Bowl

Favorite Ginger Cookies

There’s something about the flavors of molasses and warming spices that reminds me of holidays spent baking, indulging and making merry. This recipe, which comes from a childhood friend, combines ginger, cinnamon, cloves and molasses in a slightly chewy, slightly crunchy package that is high on my list of favorite cookies. While you can mix the dough by hand, it’s much easier — and faster — if you have a stand mixer.

Makes about two dozen

Ingredients

3/4 cup shortening
1 cup sugar
1/4 cup dark molasses
1 egg, lightly beaten
2 cups flour
2 tsp baking soda
1 tsp ground cinnamon
1 tsp ground cloves
1 tsp powdered ginger
1/4 tsp salt

Preheat oven to 375 degrees.

Using a hand or stand mixer, cream the shortening and sugar until fluffy and smooth. Add molasses and egg, beat well.

Whisk together the remaining ingredients, then add to the sugar mixture, beating in a little at a time until well combined.

Roll the dough into balls (about 1 1/2 inches diameter), then dip in sugar to coat. Place the balls 2 inches apart on a baking sheet that’s been greased or lined with parchment paper. Bake until lightly browned, about 12-15 minutes. Allow the cookies to cool slightly, then transfer to a wire rack.

Pictured: Pyrex Flamingo 909 Pie Plate, Pyrex Butterfly Gold 403 Round Mixing Bowl, Corning Ware Grab-It Bowl, Corning Ware Snack-It Plate

Slow Cooker White Chicken Chili

Recently we had family coming over for dinner, but we were going to be away from home all afternoon. Perfect scenario for a slow-cooked meal! I decided to make white chicken chili with all the fixings, and it was a big hit. One nice thing about this recipe is that it’s relatively mild — despite the three jalapeños (they mellow out a lot when cooked). Then you can spice it up to taste with toppings.

Adapted from the White Chicken Chili in Slow Cooker Revolution.

Serves 6-8

Ingredients

2 onions, chopped fine
3 jalapeño chiles, stemmed, seeded and minced
2 tbsp olive oil
6 garlic cloves, minced
4 tsp ground cumin
2 tsp ground coriander
3 tbsp canned fire-roasted green chiles
4 cups low-sodium chicken broth
3 15-oz cans cannellini beans, drained and rinsed
3 lbs bone-in chicken thighs, skin removed
salt
pepper
1 tbsp masa harina
1/4 cup fresh cilantro, chopped

In a large skillet over medium-high heat, saute onions and jalapeños until translucent and slightly browned, about 8-10 minutes. Add garlic and cook until fragrant, about 1 minute. Stir in cumin, coriander and green chiles. Deglaze the pan with 1 cup of the broth, scraping up any browned bits, and transfer to slow cooker.

Add the beans and 2 cups more broth to the slow cooker and stir. Season chicken with salt and pepper and place in the slow cooker, making sure all the pieces are mostly submerged. Cover and cook on low until the chicken is tender and falls off the bone easily, about 4-6 hours.

Keeping the slow cooker on, remove chicken and shred into bite-size pieces (discard the bones). Once the chili has settled, remove as much fat as possible by skimming the surface with a large spoon. Stir back in the shredded chicken and let sit a few minutes until hot.

In a small pot, simmer masa in 1 cup of chicken broth for about 10 minutes to thicken, then add to the slow cooker. Stir in cilantro and add salt to taste. Serve with an array of toppings.

Toppings:

  • lime wedges
  • sliced jalapeños (fresh or pickled)
  • shredded cheese
  • chopped green onions
  • sour cream
  • hot sauce (Tabasco or similar)
  • red pepper flakes

Pictured: Pyrex Butterfly Gold 403 Round Mixing Bowl, Corning Ware French White F-15-B Oval Casserole, Corning Ware Spice O’ Life P-81-B Menuette Saucepan, Corning Ware Blue Cornflower P-41-B Petite Pan (x4)

Cranberry Apple Breakfast Cake

When I was growing up, one recipe my family always made for guests was a breakfast cake called Apple Delight. I suspect it might have come from a magazine or newspaper clipping at some point, as many “family recipes” do. But after decades of baking it again and again, it has been imprinted on my family history.

The original recipe just calls for apples, but after stocking up on some post-Thanksgiving cranberries, I decided to try mixing them in. The cranberries add a nice tang and extra dimension to the cake.

Note: I baked this in an 8×8 pan because I wanted to use my Fire King dish, but it’s really too small — the batter ended up ballooning over the top edges of the pan and the top got very brown by the time the cake fully set. If you don’t have a 9×9 pan, 8×8 is doable — just allow for some extra cooking time.

Ingredients

3/4 cup chopped pecans
1 1/2 cups sugar
1 1/2 cups flour
4 tsp baking powder
1/2 cup milk
3 eggs, lightly beaten
2 tsp vanilla
1 1/2 cups peeled and chopped granny smith apples (about 2 small apples)
1 cup fresh cranberries

Preheat oven to 350 degrees.

Spread the pecans out on a baking sheet and toast in the oven until fragrant, about 6-8 minutes. Set aside.

In a large bowl, whisk together dry ingredients. In a separate bowl, combine milk, eggs and vanilla. Add to the dry ingredients and mix until just combined. Stir in apples, cranberries and pecans.

Pour into a greased and floured 9×9 pan and bake until the top is golden brown and a toothpick inserted in the center comes out clean, about 35-45 minutes. Allow to cool slightly before serving.

Pictured: Fire King Hildi Fruit Square Baking Dish, Pyrex Butterfly Gold 404 Round Mixing Bowl, Pyrex Butterfly Gold 402 Round Mixing Bowl, Pyrex Butterfly Gold 401 Round Mixing Bowl, Hazel Atlas Egg Beater Cup, Corning Ware Snack-It Plate


Whole Wheat Buttermilk Cornbread

With Thanksgiving around the corner, I’ve been thinking about cornbread — and more specifically, cornbread stuffing. Cook’s Illustrated has a great cornbread stuffing recipe that I tried a few years ago, and this time around I’m curious about making a whole wheat version. My first step: testing out a whole wheat cornbread recipe.

The whole wheat flour gives this cornbread an earthiness that’s especially tasty topped with good local honey. I’ll definitely be making it again for cornbread stuffing next month.

Adapted from Cook’s Illustrated‘s Golden Cornbread for Stuffing (The New Best Recipe, America’s Test Kitchen 2004)

Ingredients

3 eggs
1 cup buttermilk
1 cup milk
1 1/2 cups yellow cornmeal
1 1/2 cups whole wheat flour
1 tbsp baking powder
3/4 tsp baking soda
4 tsp sugar
3/4 tsp salt
3 tbsp unsalted butter, melted

Preheat oven to 375 degrees. Grease a 13×9 baking dish (or equivalent — I used two 8-inch square dishes).

Whisk together dry ingredients in a large bowl. Whisk eggs, buttermilk and milk in a separate bowl. Pour the egg/milk mixture into the dry ingredients and stir until just combined. Stir in melted butter.

Pour the batter into the baking dish and bake until the top is cracked and golden and edges are pulling away from the sides, about 30-40 minutes.

Place the baking dish on a wire rack to cool for at least 1 hour before serving.

Pictured: Corning Ware Floral Bouquet Third Edition A-2-B Casserole (x2), Corning Ware Spice O’ Life P-81-B Menuette Saucepan, Pyrex 532 Measuring Cup, Pyrex Butterfly Gold 404 Round Mixing Bowl

Thrifted Find: Pyrex Divided Dishes

Pyrex divided dishes are especially fun to collect, due to the sheer variety of limited-release patterns out there. My favorite is Dandelion Duet (pictured above), which came out in 1959, advertised for its ability to hold two separate packages of frozen foods in one dish. (The Corning Museum of Glass has a great ad from the era in its library collection here.)

After a flurry of bidding on the Goodwill auction website, I’ve found myself with quite a few dishes (is this what obsession looks like?):

img_1892

Clockwise from top right: Verde, Snowflake (x2), Pink Daisy, Opal,  Royal Wheat, Golden Acorn, Town and Country, Dandelion Duet, Butterfly Gold.

Since shopping Goodwill online is sort of like cheating, I also took a picture of the pieces I actually scored in real-world thrift stores (Savers and Hope Thrift). Finding lids is always a particular treat.

img_1897

So what can divided dishes be used for? Chips and dip, cheese and crackers, soup and salad, chicken and waffles, spicy and mild, two different sides, different flavors of jello, individual pies with one crust … the possibilities are endless. I’ve also heard of people using them as dinner plates.

It’s worth noting that other manufacturers also made divided dishes. I frequently see Glasbake models in thrift stores, and Fire King seems to have some too.