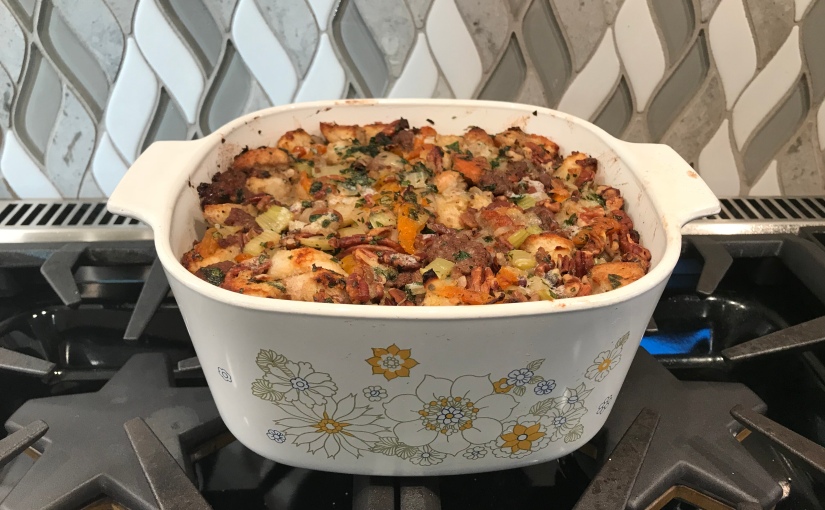
Sausage, Apricot and Pecan Stuffing

My go-to recipe for stuffing comes from Cooks Illustrated — it takes some time, but it’s straight-forward and delicious. My only complaint is that the original version makes too much stuffing, especially if you’re not planning to stuff the turkey. And let’s face it: Cooking the stuffing on the side just gives you more exciting options for the turkey itself (e.g., spatchcocking, deep frying, etc.).

So here, I’ve scaled the recipe back a bit to make it more manageable, and modified it for baking in a casserole dish. It’s suitable for a 13×9 baking pan or 3-quart casserole.

Adapted from Cooks Illustrated’s Bread Stuffing with Sausage, Pecans and Dried Apricots (The New Best Recipe, America’s Test Kitchen 2004).

Ingredients

1 loaf french bread (1 pound)
1 1/2 cup chopped pecans
1 lb sweet Italian sausage
4 tbsp unsalted butter
1 small onion, chopped
3 celery ribs, chopped
heaping 1/4 tsp each dried sage, thyme and marjoram
1/4 tsp ground black pepper
heaping 1/4 cup fresh parsley, finely chopped
2/3 cup dried apricots, sliced in thin strips (about 1/4 lb)
1/2 tsp salt
1 cup low-sodium chicken broth
2 large eggs

Preheat oven to 225 degrees. Divide the bread into thirds; save 1/3 for another use, and cut the rest into 1/2-inch slices. Arrange the slices in a single layer on a sheet pan and bake for 30-40 minutes. The bread should end up dried but not browned. Once it has cooled slightly, cut the bread into 1/2-inch cubes and set aside.

Turn the oven up to 350 degrees. Spread the pecans out on the sheet pan and toast in the oven until fragrant, about 6-8 minutes. Set aside.

Preheat the oven to 400 degrees.

In a large skillet over medium heat, cook the sausage (casings removed, if there are any), breaking it up into bite-size pieces, until browned and no pink remains. Transfer to a large bowl and set aside.

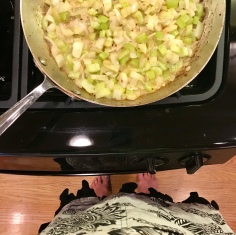
Remove excess grease from the pan, then add the butter. Saute the onions and celery until soft and translucent, about 6-8 minutes. Add the sage, thyme, marjoram and pepper and cook 1 minute more. Transfer to the bowl with the sausage and stir.

Stir the parsley, apricots, pecans and salt into the sausage mixture, then top with the bread cubes. In a separate bowl or measuring cup, whisk together the broth and eggs, then pour over the bread cubes.

Fold the bread cubes into the sausage mixture until thoroughly mixed. Spread the stuffing out into a buttered baking dish, tamping it down gently with a spoon or spatula to fill the dish evenly. (At this point you can cover and refrigerate overnight if desired. Let it sit out at room temperature for about 30 minutes before baking.)

Dot the surface of the stuffing with small bits of butter. Cover with a piece of buttered aluminum foil and bake until hot throughout, about 25-30 minutes. Remove the foil and bake about 15 minutes more, until the top is golden brown.

Pictured: Corning Ware Floral Bouquet Third Edition A-3-B Casserole, Pyrex Town and Country 444 Cinderella Mixing Bowl, Pyrex Town and Country 443 Cinderella Mixing Bowl, Pyrex Spring Blossom 2 403 Round Mixing Bowl, Pyrex Measuring Cup, Glasbake French Casserole

Roasted Tomato and Black Bean Salsa

There’s nothing like fresh homemade salsa — especially if you grow your own tomatoes. But if you’re like me and pretty lacking in the green thumb department, supermarket tomatoes can still make a tasty salsa, with a little help from the broiler.

I typically opt for cherry tomatoes, because they seem to have the most flavor of all the grocery store tomato options. Roasting them helps concentrate that flavor even more and gives them a mild smokiness — creating a great salsa base. Roasting the jalapeños mellows them out a bit so that they add just the right amount of spice. Corn brings a little sweetness, and black beans practically turn the salsa into a meal in itself!

This recipe makes about 4 cups of salsa — enough to bring to a party and save some for yourself.

Ingredients

2 lbs cherry tomatoes, sliced in half
6 jalapeño peppers, stemmed, sliced in half and mostly seeded
6 cloves of garlic, unpeeled
1 red onion, chopped fine
1 15-oz can black beans, drained and rinsed
1 cup frozen corn, rinsed to defrost
1-2 tsp salt
1/4 cup fresh squeezed lime juice
1/2 cup cilantro leaves and tender stems, chopped fine

Preheat oven on the broiler setting and set a rack about four inches from the heat source. Arrange tomatoes cut side up on a lightly oiled sheet pan, then broil until they start to char in spots, about 8-10 minutes. Set aside to cool.

On another lightly oiled sheet pan, arrange garlic and jalapeños (also cut side up). Broil 4-5 minutes, then flip everything and broil until jalapeño skins are well charred. Keep an eye on the garlic to make sure it doesn’t burn (you’ll probably need to take it out a few minutes early). When the jalapeños are done, transfer to a Ziploc bag, seal and let sit for about 10 minutes (this helps separate the skins from the flesh of the peppers).

Squeeze the garlic out of its skin and mince. Place in large bowl and add onion, black beans and corn. Peel the jalapeños, chop fine and add to the bowl. Mix well.

Squeeze the tomatoes out of their skins and into a small bowl. Puree with an immersion blender (or regular blender), then stir into the black bean mixture.

Add salt to taste, then stir in lime juice and cilantro. Chill for at least 1 hour before serving.

Pictured: Pyrex Verde 444 Cinderella Mixing Bowl, Pyrex Clear 323 Mixing Bowl, Glasbake French Casserole

Easy Lemon Sriracha Aioli

Normally, I don’t keep mayonnaise around the house because nobody in my family likes it — but this flavor-packed lemon sriracha aioli might just change that. It couldn’t be easier to whip up, and it makes an amazing spread or dipping sauce for so many things: think salmon burgers, steamed veggies like artichoke or asparagus, sweet potato fries — anything that can do with a zing of lemon and a little spice.

Ingredients

1/2 cup mayonnaise
2 tbsp sriracha (or Cherry Bomb Pepper Sauce)
zest of 1 lemon, finely grated (about 1 tsp)
salt

Whisk together the mayonnaise, sriracha and lemon zest. Add salt to taste. Refrigerate for at least 1 hour before serving.

Pictured: Pyrex Spring Blossom 441 Cinderella Mixing Bowl, Glasbake French Casserole, Corning Ware Snack-It Plate

Bok Choy Carrot Kimchi

Recently when a neighbor brought us a giant head of bok choy from his garden, I decided to finally get around to making something I’ve been wanting to try: bok choy kimchi. Some Googling suggested that bok choy is often paired with carrots in kimchi, and spring onions were in season at our farmers market, so that’s what I went with — not necessarily authentic, but delicious. I love how colorful this kimchi turned out, with the bok choy’s dark green leafy bits, big chunks of spring onion, bright orange carrots and red spices.

You’ll need to make a trip to the Asian grocery store to find gochugaru (Korean red pepper flakes) and gochujang (Korean fermented red chili paste). They really are the foundation of kimchi’s flavor — no substitutions will do, though in a pinch you can omit the gochujang.

img_3725

A few notes:

  • Chopping: If you’re wondering how thick or thin to slice your vegetables, think about how you will eat the finished product. Do you like to munch on big chunks, or do you prefer a slaw-like consistency? Chop accordingly.
  • Spice: Different brands of gochugaru will have different levels of spice, which obviously will impact the spiciness of your kimchi. You may need a couple rounds of experimentation to attain the heat you want.
  • Fermentation vessel: You can ferment kimchi in just about anything — a mason jar, a loosely covered (non-reactive) bowl, a ceramic crock. Mostly it’s important to keep the ingredients immersed in the brine. There are a variety of weights and mechanisms available to do so (e.g., I have used both Kraut Source and Pickle Pebbles), or you can use a zip-lock bag full of water to keep things submerged. I am the lucky owner of a fermentation crock hand made by my mother-in-law, complete with perfectly sized ceramic weights, so that’s my vessel of choice.

Recipe adapted from Kraut Source’s Traditional Kimchi.

Ingredients

3 lbs bok choy, chopped
6 carrots, peeled and sliced
6 stalks spring onion (or 8 green onion), chopped
1/2 cup sea salt
4 cloves garlic, minced
1 tbsp ginger, minced
1 tbsp soy sauce
1 1/2 tsp turbinado sugar (aka “sugar in the raw”)
1/3 cup gochugaru
2 tbsp gochujang

In a large bowl, combine the bok choy, carrots and spring onions. Sprinkle with the salt and toss, massaging the veggies to ensure they are thoroughly salted. The bok choy should start to soften.

Add enough water to cover the veggies, then weigh them down with a plate and something heavy (like a glass of water). Let them sit for 1 hour, then drain, reserving and setting aside some of the brine. Rinse the veggies in a colander, let them drain for 15 minutes, and then return them to the bowl.

In a small bowl, combine the garlic, ginger, soy sauce, sugar, gochugaru and gochujang. Add to the veggies and mix, using gloved hands or a pair of tongs.

Pack the kimchi mixture into your fermentation vessel, pressing down firmly to eliminate air pockets. Top with some of the reserved brine — enough so that the veggies are just barely submerged. (The bok choy will release additional water during the fermentation process.) Cover with whatever weight and lid you’re using. Note: If you are not using an airlock mechanism, make sure your lid is loose enough to release the gas generated by fermentation.

Ferment at room temperature for at least 5 days, longer to taste. The kimchi should have a pleasant fermented odor — strong but not foul. Taste for doneness, then transfer to the refrigerator.

Pictured: Pyrex Gooseberry 444 Cinderella Mixing Bowl, Pyrex Yellow 404 Round Mixing Bowl, Pyrex Spring Blossom 442 Cinderella Mixing Bowl, Glasbake J2663 Handled Bowl

Thrifted Find: Glasbake French Casseroles

I see these little Glasbake handled bowls at thrift stores fairly often — usually in plain white milk glass, with slight variations in the shape of the handle. They are frequently referred to as chili bowls or soup bowls, but I think their size is better suited to ice cream. Either way, they were originally sold as “French Casseroles,” intended for individual baked sides.

I was thrilled to find this beautiful set of four colors, complete with original lids, on the Goodwill online auction site. I believe they were part of a “Patioware” set that included square serving tiles — don’t think I’ll ever find those. But the colors are so cheery, I hardly mind. These rank pretty high on my list of favorite pieces!

img_2891

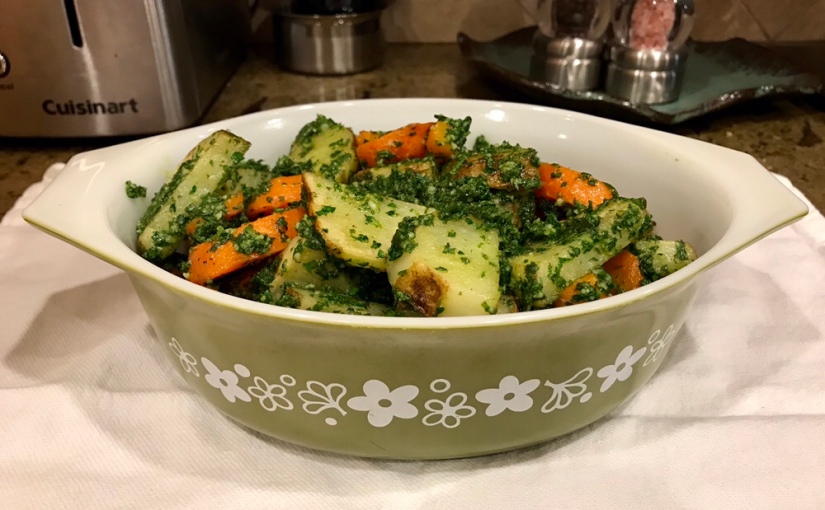
Roasted Carrots and Potatoes with Carrot Top Pesto

For a few Saturdays in a row, I’ve watched people flock to the carrots in the vegetable booth at our neighborhood farmers’ market — brilliant orange specimens, stubby, with a ton a fresh leafy greens attached. So this weekend, I bought them too. It was the perfect opportunity to make the carrot top pesto I’d seen in a Bon Appetit recipe, which I’ve adapted here.

Serves 4-6

Ingredients

1-2 lbs carrots with tops, trimmed and peeled
1 lb russet potatoes, partially peeled (about 2 large)
1/4 cup plus 2 tbsp olive oil
salt
pepper
1/4 cup (packed) fresh basil
1/4 cup (packed) fresh parsley
1 garlic clove, minced
1/4 cup grated Parmesan cheese

Preheat oven to 450 degrees. Move a rack to the top third of the oven.

Cut the potatoes into half-inch slices. If your carrots are skinny, cut into 2- to 3-inch chunks; if they are fat, cut on the diagonal into half-inch slices. Toss in 2 tbsp olive oil and spread out in an even layer on a baking sheet.

Roast until the carrots and potatoes are tender and browned, about 30-40 minutes.

In a food processor, combine 1 cup (packed) of the carrot tops (leaves and tender stems only), basil, parsley, garlic, Parmesan and 1/4 cup olive oil. Pulse until you have a coarse puree. Season with salt and pepper.

Let the carrots and potatoes cool slightly, then toss with the pesto and serve.

Pictured: Glasbake Vegetable Medley J2024 Rectangular Baking Dish, Pyrex Spring Blossom 043 Oval Casserole
Thrifted Find: Glasbake Casseroles

There’s something about Glasbake — the patterns are so cheery and bright, yet mysterious, as they often don’t have a name. I see it a lot in thrift stores, but only buy the patterns that strike my fancy. These two seem to go by generic descriptions: blue (or teal or turquoise) fruit and yellow daisy (or possibly daisy days). I believe both designs came in other colors too. They were quite the find at Goodwill, near-mint condition with lids.

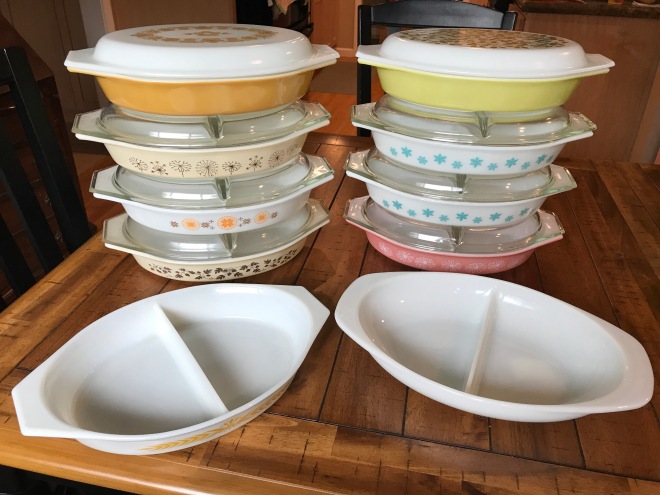
Thrifted Find: Pyrex Divided Dishes

Pyrex divided dishes are especially fun to collect, due to the sheer variety of limited-release patterns out there. My favorite is Dandelion Duet (pictured above), which came out in 1959, advertised for its ability to hold two separate packages of frozen foods in one dish. (The Corning Museum of Glass has a great ad from the era in its library collection here.)

After a flurry of bidding on the Goodwill auction website, I’ve found myself with quite a few dishes (is this what obsession looks like?):

img_1892

Clockwise from top right: Verde, Snowflake (x2), Pink Daisy, Opal,  Royal Wheat, Golden Acorn, Town and Country, Dandelion Duet, Butterfly Gold.

Since shopping Goodwill online is sort of like cheating, I also took a picture of the pieces I actually scored in real-world thrift stores (Savers and Hope Thrift). Finding lids is always a particular treat.

img_1897

So what can divided dishes be used for? Chips and dip, cheese and crackers, soup and salad, chicken and waffles, spicy and mild, two different sides, different flavors of jello, individual pies with one crust … the possibilities are endless. I’ve also heard of people using them as dinner plates.

It’s worth noting that other manufacturers also made divided dishes. I frequently see Glasbake models in thrift stores, and Fire King seems to have some too.


Thrifted Find: GE Beehive Mixing Bowl

I have a soft spot for these utilitarian bowls made for vintage stand mixers. Various glass companies produced them for various mixer brands, usually in two-bowl sets. The bowls in the back of the photo were my first purchases when I started looking for vintage kitchenware in thrift stores: Fire King on the left (found the two-bowl set at Hope Thrift, and was bummed to discover today that the smaller bowl was cracked) and Glasbake on the right (found at Goodwill). Both were designed for Sunbeam mixers. The GE beehive bowl in the front of the photo is my most recent find, snagged at Hope Thrift. I’d been eyeing it on the shelf for a few weeks, and finally caved when it was marked 50 percent off.

The large bowls make great salad bowls, and the small ones are handy for storing leftover soup and such in the fridge. Now I’ll be on the hunt for a replacement bowl to complete the Fire King set.

Thrifted Find: Glasbake Blue Onion

Glasbake patterns are notoriously difficult to identify, but after a lot of Googling I’m pretty confident that this is Blue Onion. I found this divided casserole dish at Goodwill and couldn’t resist it!

The best Glasbake information I’ve found is on a couple of blogs about vintage kitchenware and collectibles: They Call This America and The Kitschy Collector.