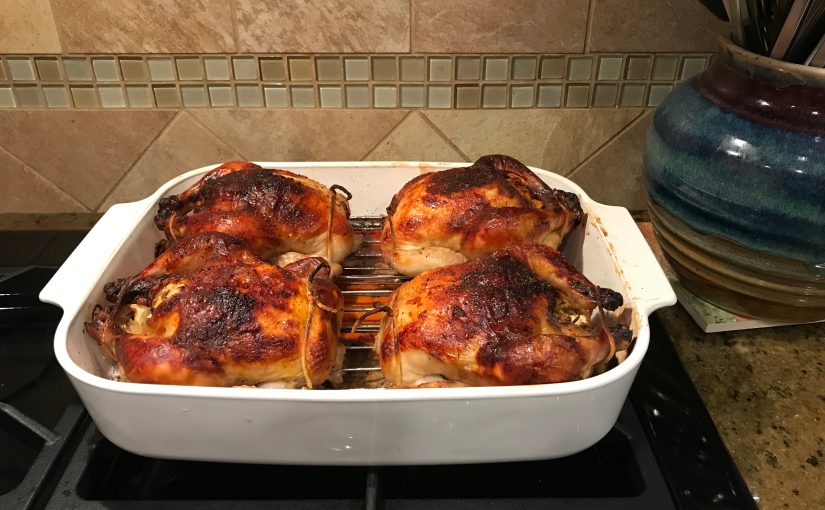
Roasted Cornish Game Hens with Lemon and Herbs

Cornish game hens are a great way to make a special meal out of what is essentially just ordinary chicken. There’s something festive about having your own tiny roast bird on your plate; it’s one of my favorite things to make for Christmas dinner.

Brining in buttermilk overnight helps make the hens extra tender and juicy, and also makes the roasting process more forgiving — it’s hard to go wrong! The only problem I’ve ever run into is overcrowding in the oven. I once tried to roast 12 hens at once (two sheet pans with six hens each, on two oven racks) for a big family gathering, and while they tasted great they never got the deep golden color that makes the dish so appealing.

Adapted from Kitchen Confidante’s Buttermilk Brined Cornish Hens.

Serves 4-8 (1 hen per person, or half for a more modest portion size)

Ingredients

4 Cornish game hens, rinsed and patted dry
6 cups buttermilk
1 tbsp salt
2 tsp cayenne
2 tsp garlic powder
2 tsp dried thyme
juice of 1 lemon
1 lemon, cut in quarters
4 cloves garlic
4 sprigs fresh rosemary
olive oil
kosher salt
freshly ground pepper
paprika (sweet)

In a large bowl or pot, combine the buttermilk, salt, cayenne, garlic powder, thyme and lemon juice. Place the hens in the brine, making sure they are mostly submerged. Cover and refrigerate overnight.

Take the bowl out of the refrigerator and let sit at room temperature for about 30 minutes. Preheat the oven to 425 degrees and adjust a rack to the lower-middle position.

Remove the hens from the brine and pat dry. Place a lemon quarter, garlic clove and rosemary sprig in each cavity. Truss the hens with cooking twine (I did a variation of the technique in this video; give yourself at least 2 feet of twine to work with for each hen).

Place the hens on a rack in a roasting pan or sheet pan. Rub the skins with olive oil and sprinkle with salt, pepper and paprika. Roast until the hens are a deep golden brown and the internal temperature reaches 180 degrees, about 1 hour.

Pictured: Corning Ware White A-21-B-N Open Roaster

7 Steps to Perfect Hard-Boiled Eggs

For years, I was a devotee of the Julia Child method for cooking hard-boiled eggs. Essentially, it’s a cold-start process: Begin with eggs in cold water, bring to a boil, then turn off the heat, cover and let sit for 17 minutes. But recently I switched to a hot-start process, and I’ve become convinced that the outcome is superior. The main difference: Plunging the eggs into boiling water makes them easier to peel. While I’m hardly the first person to discover this, it’s a method that bears repeating. Here are my seven steps to hard-boiled success:

  1. Plan ahead: The fresher the eggs, the harder they are to peel, so if you are planning to make something with a lot of hard-boiled eggs (deviled eggs, potato salad, egg salad, etc.), try to buy your eggs a few weeks in advance.
  2. Let the eggs warm up a bit: Set them out on the counter for about half an hour to lose their refrigerator chill. This helps prevent them from cracking when you first drop them into boiling water.
  3. Fill a pot with a few inches of water (enough to cover the eggs) and bring to a boil. The pot should be large enough to hold the eggs in a single layer.
  4. Turn the heat down to low, then use a slotted spoon to gently lower the eggs into the pot.
  5. Adjust the heat to a very low simmer (barely bubbling) and cook the eggs for 10-11 minutes. The yolks should end up cooked through but still moist, not chalky. Timing depends on the intensity of the simmer, so it takes a little practice to get a precise result.
  6. Plunge the eggs into a bowl of ice water to stop cooking.
  7. Peel and enjoy! Season with salt and fresh-ground black pepper. I also like to add paprika (sweet or smoked), cayenne, chipotle powder, chili powder or creole seasoning for a little extra flavor and spice.

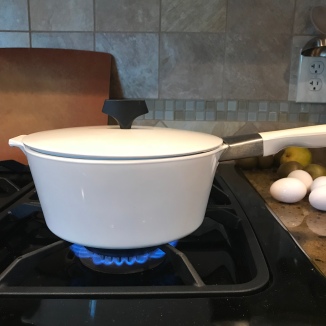
Pictured: Corning Ware White B-2 1/2 Buffet Server, Corning Ware French White F-15-B Oval Casserole

Roasted Chicken and Leeks

I’m the type of person who sometimes finds herself with too many leeks. Or kumquats. Or avocados. Or eggs. Mostly it’s because I have no concept of quantity when I’m ordering my Imperfect Produce delivery online. So a good portion of my cooking starts with “What am I going to do with all this x?” And when it’s a vegetable, roasting is usually involved.

Roasting leeks and chicken together makes for an especially easy dish because there’s minimal prep and minimal clean-up required. Pair it with some rice and a salad, and dinner is served!

Serves 6-8

img_5953

Ingredients

2 large leeks (about 1 1/2 lbs), sliced in 1/4-inch rounds

1 medium onion, cut into 1/2-inch wedges

4 lbs chicken drumsticks (bone-in, skin-on)

2 bay leaves

2 tsp dried thyme

olive oil

salt

pepper

paprika (sweet)

Preheat oven to 375 degrees.

In a large roasting pan or sheet pan, combine leeks, onion and bay leaves. Sprinkle with 1 tsp thyme plus salt and pepper to taste. Drizzle with 1-2 tbsp olive oil and toss until everything is coated.

Arrange the chicken on top of the leek mixture. Sprinkle with the remaining 1 tsp thyme plus salt, pepper and paprika. Drizzle a little more olive oil over the chicken.

Bake until chicken is golden and internal temperature is at least 165 degrees (for this recipe I prefer it closer to 180 degrees), about 1 hour to 1 hour 15 minutes. Remove chicken from the pan and set aside. Spread the leek mixture around evenly, then turn on the broiler and move a rack up about 4 inches from the heat source. Broil the leeks a few minutes until slightly browned (even charred in spots).

Serve chicken topped with the leek mixture. Garnish with fresh thyme if desired.

Pictured: Corning Ware White A-21-B-N Open Roaster