Orange Cardamom Blueberry Muffins

It’s Sunday morning and I’m baking on a rainy day. But this is no ordinary rainy day: It’s also day 3 of our new social distancing routine. For the next three weeks, our schools are closed, we’re working from home and we’re trying to limit our contact with other people and places. Doing our part to protect public health during this global coronavirus pandemic!

So, today baking serves two purposes: It’s a stress-relieving activity, and it’s restocking our supply of muffins (my daughter’s favorite breakfast) so we don’t have to go to the grocery store for a while. And the muffins are pretty delicious, too.

Adapted from Food and Wine‘s Blueberry-Sour Cream Muffins.

Makes one dozen muffins

Ingredients

1 1/2 cups all-purpose flour
2 tsp baking powder
1/4 tsp baking soda
1/2 tsp salt
1/4 tsp ground cardamom
1 egg
3/4 cup sugar
1 tbsp butter, melted and cooled slightly
1 cup plain yogurt
1 tsp vanilla extract
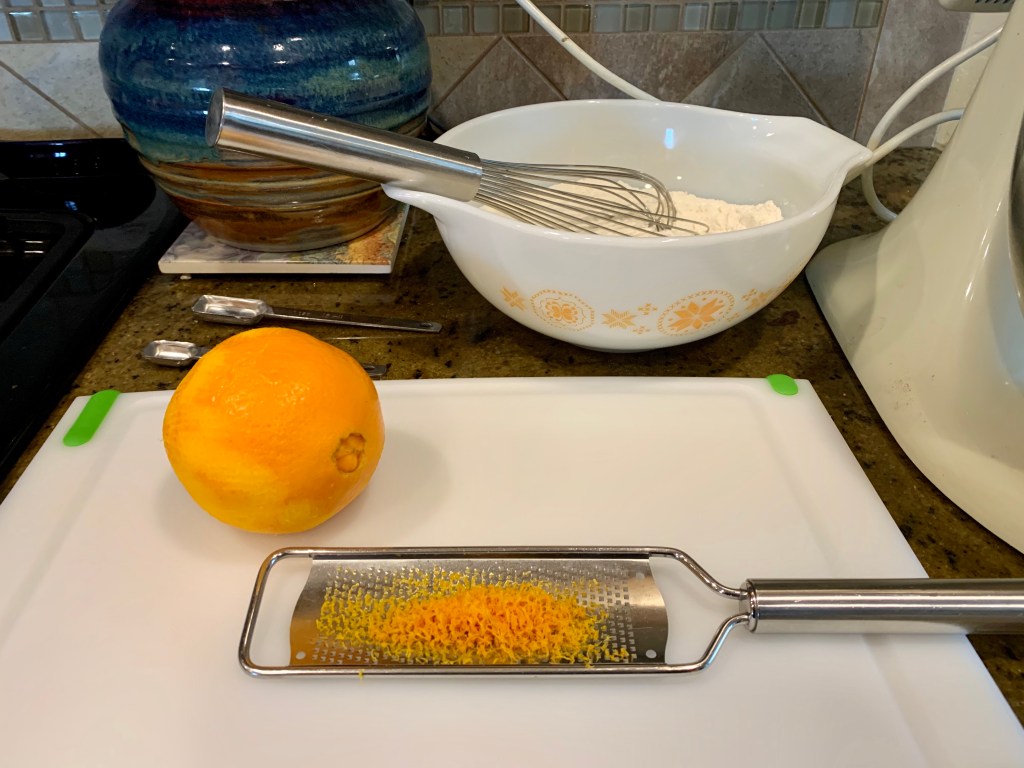
finely grated zest of 1 orange
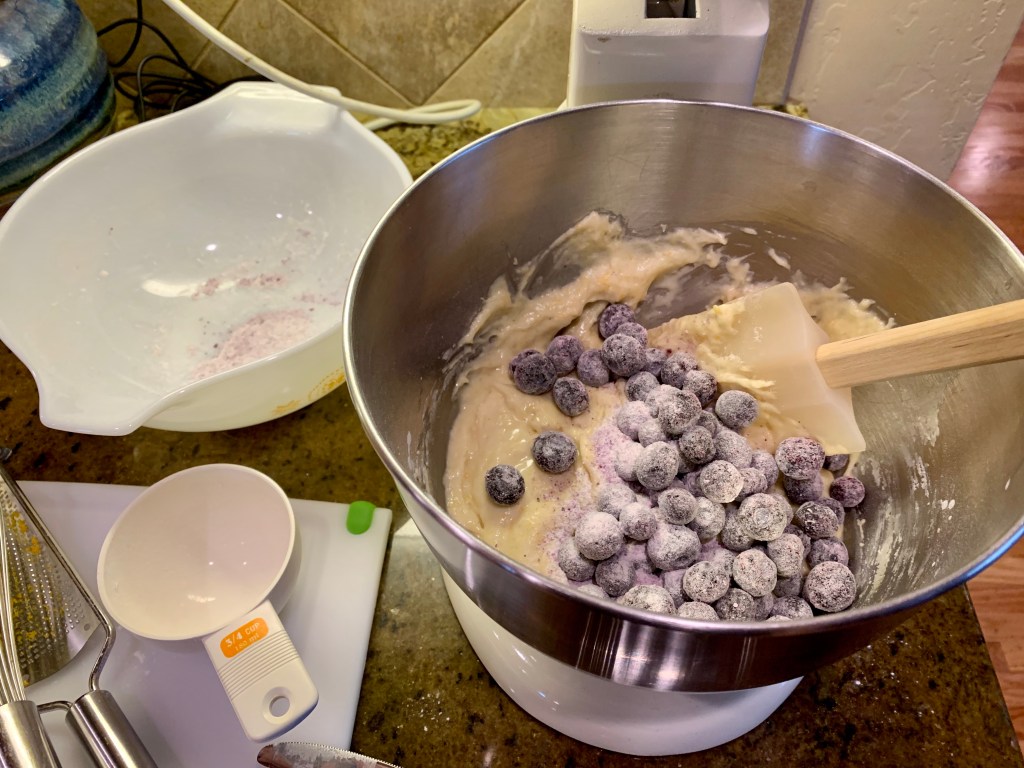
1 heaping cup frozen blueberries, tossed with 1 tbsp all-purpose flour
1 tbsp coarse sugar (such as Sugar in the Raw)

Preheat oven to 375 degrees. Grease a standard 12-cup muffin pan (or use paper liners).

In a medium bowl, whisk together the flour, baking powder, baking soda, salt and cardamom. In a large bowl, beat the egg, then beat in the sugar and melted butter until smooth and pale yellow in color. Add the yogurt, vanilla extract and orange zest, and beat until well combined. Stir in the dry ingredients a little at a time, then fold in the blueberries.

Use a spoon or ice cream scoop to portion the batter into muffin cups, filling them about three-quarters full. Sprinkle liberally with sugar.

Bake for 25 minutes, until the tops are golden and a toothpick inserted in the center comes out clean. Let cool for a few minutes, then transfer the muffins from the pan to a cooling rack.

Pictured: Pyrex Town and Country 443 Cinderella Mixing Bowl, Corning Ware Snack-It Plate

Sausage and Spinach Spaghetti Pie

I’ve been on the hunt for a casserole that is fun, dramatic and delicious in equal measures — and I think I’ve found it! I love this recipe because it’s a meal in itself, but a side of garlic bread and salad wouldn’t hurt. I’m also planning to try making it again with other ingredients — a meatless version would still be tasty, as would other vegetables (eggplant? chard? zucchini?). Just be careful not to add too much moisture, or the final product won’t set properly.

If you don’t have a springform pan, an 8-inch cake pan will do. But you’ll miss out on the fun of releasing the sides of the pan and letting the pie stand on its own.

Adapted from Food Network’s Beefy Cheesy Spaghetti Pie.

Serves 6

Ingredients

6 oz uncooked spaghetti
2 tbsp olive oil
8 oz bulk Italian sausage (remove casings if you’re using links)
1 onion, chopped
3 cloves garlic, minced
1 15-oz can crushed tomatoes
12 oz baby spinach, roughly chopped
1/4 cup heavy cream
salt
pepper
4 large eggs
1/4 cup plus 1 tbsp grated Parmesan cheese
8 oz small mozzarella balls, drained
cooking spray

Preheat oven to 425 degrees.

Cook the spaghetti according to package directions, until it’s just al dente. Drain, transfer to a large bowl, then toss with 1 tbsp olive oil to keep it from sticking together. Set aside.

In a large skillet over medium heat, cook sausage in 1 tbsp olive oil, breaking it up into crumbles, until no pink remains. Spoon it out onto a paper towel-lined plate and set aside.

Add the onion to the skillet and saute until soft and translucent. Add the garlic and cook until fragrant, about one minute more. Add the tomatoes and scrape up any brown bits from the bottom of the pan.

Add the spinach a handful at a time, stirring until wilted. Stir in the cream and simmer for about 5 minutes to thicken the sauce. Add salt (about 1 tsp) and pepper to taste.

Stir together the spaghetti, sausage and sauce. Allow to cool slightly. In a small bowl, whisk together eggs and 1/4 cup Parmesan, then stir into the spaghetti mixture.

Grease a 9-inch springform pan with cooking spray. Transfer half of the spaghetti mixture to the pan, then dot with half of the mozzarella balls. Add the rest of the spaghetti mixture, then top with the rest of the mozzarella balls and 1 tbsp Parmesan.

Bake until the center is set, the edges are browned and crispy and the cheese is starting to turn golden, about 25 minutes. Let stand 5-10 minutes before serving.

Pictured: Pyrex Verde 444 Cinderella Mixing Bowl, Corning Ware Snack-It Plate

Easy Lemon Sriracha Aioli

Normally, I don’t keep mayonnaise around the house because nobody in my family likes it — but this flavor-packed lemon sriracha aioli might just change that. It couldn’t be easier to whip up, and it makes an amazing spread or dipping sauce for so many things: think salmon burgers, steamed veggies like artichoke or asparagus, sweet potato fries — anything that can do with a zing of lemon and a little spice.

Ingredients

1/2 cup mayonnaise
2 tbsp sriracha (or Cherry Bomb Pepper Sauce)
zest of 1 lemon, finely grated (about 1 tsp)
salt

Whisk together the mayonnaise, sriracha and lemon zest. Add salt to taste. Refrigerate for at least 1 hour before serving.

Pictured: Pyrex Spring Blossom 441 Cinderella Mixing Bowl, Glasbake French Casserole, Corning Ware Snack-It Plate

Favorite Ginger Cookies

There’s something about the flavors of molasses and warming spices that reminds me of holidays spent baking, indulging and making merry. This recipe, which comes from a childhood friend, combines ginger, cinnamon, cloves and molasses in a slightly chewy, slightly crunchy package that is high on my list of favorite cookies. While you can mix the dough by hand, it’s much easier — and faster — if you have a stand mixer.

Makes about two dozen

Ingredients

3/4 cup shortening
1 cup sugar
1/4 cup dark molasses
1 egg, lightly beaten
2 cups flour
2 tsp baking soda
1 tsp ground cinnamon
1 tsp ground cloves
1 tsp powdered ginger
1/4 tsp salt

Preheat oven to 375 degrees.

Using a hand or stand mixer, cream the shortening and sugar until fluffy and smooth. Add molasses and egg, beat well.

Whisk together the remaining ingredients, then add to the sugar mixture, beating in a little at a time until well combined.

Roll the dough into balls (about 1 1/2 inches diameter), then dip in sugar to coat. Place the balls 2 inches apart on a baking sheet that’s been greased or lined with parchment paper. Bake until lightly browned, about 12-15 minutes. Allow the cookies to cool slightly, then transfer to a wire rack.

Pictured: Pyrex Flamingo 909 Pie Plate, Pyrex Butterfly Gold 403 Round Mixing Bowl, Corning Ware Grab-It Bowl, Corning Ware Snack-It Plate

Homemade Hot Chocolate Mix

The best thing about making your own hot chocolate mix is you have total control. You can go with whatever type of cocoa you like, use more or less sugar, add a favorite spice — the possibilities are endless. The basic ingredients are sugar, cocoa powder and salt, but I was inspired by Alton Brown’s Hot Cocoa Mix recipe to add a little cayenne. And it’s seriously good! It’s not enough to taste spicy, but adds a layer of flavor that really enhances the chocolate.


Ingredients

2 cups granulated sugar (baker’s sugar is nice because the grains are finer — but it’s not essential)
1 cup unsweetened cocoa powder
1 tsp salt
1 pinch cayenne

For the mix: Whisk all the ingredients together until well combined. The recipe can be scaled up to make a bigger batch if desired.

For making hot chocolate: In a small pot over low heat, whisk 2 tbsp of the mix into 1 cup of milk (or scale up in the same proportion) until hot and smooth. Don’t allow the milk to boil.

Extras:

  • Make a chocolate marshmallow latte: Decrease the sugar in the mix to 1 1/2 cups. When serving the hot chocolate, add enough marshmallows to form a foamy layer at the top of the mug.
  • Make it spicy: Increase the cayenne in the mix to 1/4 tsp (or more to taste).
  • Make it Mexican: Add 1 tsp ground cinnamon to the mix.
  • Make it boozy: Spike with your favorite liqueur (can’t go wrong with Baileys Irish Cream or Kahlua) or vodka.

Pictured: Pyrex Spring Blossom 442 Cinderella Mixing Bowl, Pyrex 508 Measuring Cup, Corning Ware Spice O’ Life P-81-B Menuette Saucepan, Corning Ware Snack-It Plate

Cranberry Apple Breakfast Cake

When I was growing up, one recipe my family always made for guests was a breakfast cake called Apple Delight. I suspect it might have come from a magazine or newspaper clipping at some point, as many “family recipes” do. But after decades of baking it again and again, it has been imprinted on my family history.

The original recipe just calls for apples, but after stocking up on some post-Thanksgiving cranberries, I decided to try mixing them in. The cranberries add a nice tang and extra dimension to the cake.

Note: I baked this in an 8×8 pan because I wanted to use my Fire King dish, but it’s really too small — the batter ended up ballooning over the top edges of the pan and the top got very brown by the time the cake fully set. If you don’t have a 9×9 pan, 8×8 is doable — just allow for some extra cooking time.

Ingredients

3/4 cup chopped pecans
1 1/2 cups sugar
1 1/2 cups flour
4 tsp baking powder
1/2 cup milk
3 eggs, lightly beaten
2 tsp vanilla
1 1/2 cups peeled and chopped granny smith apples (about 2 small apples)
1 cup fresh cranberries

Preheat oven to 350 degrees.

Spread the pecans out on a baking sheet and toast in the oven until fragrant, about 6-8 minutes. Set aside.

In a large bowl, whisk together dry ingredients. In a separate bowl, combine milk, eggs and vanilla. Add to the dry ingredients and mix until just combined. Stir in apples, cranberries and pecans.

Pour into a greased and floured 9×9 pan and bake until the top is golden brown and a toothpick inserted in the center comes out clean, about 35-45 minutes. Allow to cool slightly before serving.

Pictured: Fire King Hildi Fruit Square Baking Dish, Pyrex Butterfly Gold 404 Round Mixing Bowl, Pyrex Butterfly Gold 402 Round Mixing Bowl, Pyrex Butterfly Gold 401 Round Mixing Bowl, Hazel Atlas Egg Beater Cup, Corning Ware Snack-It Plate


Pickle & Cheese Party Spread

This pickle-infused cheese spread was inspired by the old-fashioned cheese ball — and more specifically, this dill pickle cheese ball from Delish. I’ve modified the recipe slightly to serve in a casserole dish — because while cheese balls are retro cool, Pyrex is prettier.

The recipe makes enough for a party; for a smaller group, a half batch will do. Note: I made the bacon optional because while it’s visually appealing, I don’t think it adds that much to the flavor of the spread. The bacon loses its crunch pretty quickly in the refrigerator, so if you’re making the dish ahead of time, it may be better to omit.

Ingredients

2 8-oz blocks cream cheese
1 1/2 cups sharp cheddar cheese, shredded
1 cup mozzarella, shredded
3 tbsp fresh dill, chopped fine
1 tsp garlic powder
1 tsp paprika
1/2 cup dill pickles, chopped fine (about 3 whole baby dills)
1 tbsp pickle juice
salt
pepper
6-8 slices cooked bacon, chopped fine (optional)

Set cream cheese out to bring to room temperature. If desired, chop the cheddar and mozzarella into finer pieces.

In a large bowl, combine 1 cup of the cheddar with the mozzarella, garlic powder, paprika and 1 tbsp of the dill, and stir until mixed. Stir in the pickles and pickle juice. Add the cream cheese and stir until thoroughly incorporated. Season to taste with salt and pepper.

Spoon the mixture into a small casserole dish and spread around in an even layer. Refrigerate for at least 2 hours.

For the topping, combine the bacon with 1/4-1/2 cup cheddar and 1-2 tbsp dill (amount depends on the diameter of your casserole dish — if it’s large like a pie plate, use more; if it’s small like a ramekin, use less). Sprinkle the topping over the spread and serve.

Pictured: Pyrex Spring Blossom 472 Cinderella Round Casserole, Pyrex Spring Blossom 503 Refrigerator Dish, Pyrex Spring Blossom 443 Cinderella Mixing Bowl, Pyrex Spring Blossom 401 Round Mixing Bowl, Corning Ware P-185-B Snack-It Plate