Bok Choy Carrot Kimchi

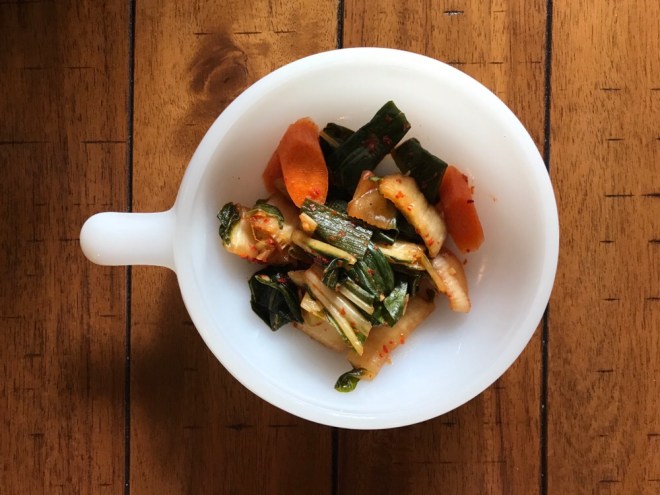
Recently when a neighbor brought us a giant head of bok choy from his garden, I decided to finally get around to making something I’ve been wanting to try: bok choy kimchi. Some Googling suggested that bok choy is often paired with carrots in kimchi, and spring onions were in season at our farmers market, so that’s what I went with — not necessarily authentic, but delicious. I love how colorful this kimchi turned out, with the bok choy’s dark green leafy bits, big chunks of spring onion, bright orange carrots and red spices.

You’ll need to make a trip to the Asian grocery store to find gochugaru (Korean red pepper flakes) and gochujang (Korean fermented red chili paste). They really are the foundation of kimchi’s flavor — no substitutions will do, though in a pinch you can omit the gochujang.

img_3725

A few notes:

  • Chopping: If you’re wondering how thick or thin to slice your vegetables, think about how you will eat the finished product. Do you like to munch on big chunks, or do you prefer a slaw-like consistency? Chop accordingly.
  • Spice: Different brands of gochugaru will have different levels of spice, which obviously will impact the spiciness of your kimchi. You may need a couple rounds of experimentation to attain the heat you want.
  • Fermentation vessel: You can ferment kimchi in just about anything — a mason jar, a loosely covered (non-reactive) bowl, a ceramic crock. Mostly it’s important to keep the ingredients immersed in the brine. There are a variety of weights and mechanisms available to do so (e.g., I have used both Kraut Source and Pickle Pebbles), or you can use a zip-lock bag full of water to keep things submerged. I am the lucky owner of a fermentation crock hand made by my mother-in-law, complete with perfectly sized ceramic weights, so that’s my vessel of choice.

Recipe adapted from Kraut Source’s Traditional Kimchi.

Ingredients

3 lbs bok choy, chopped
6 carrots, peeled and sliced
6 stalks spring onion (or 8 green onion), chopped
1/2 cup sea salt
4 cloves garlic, minced
1 tbsp ginger, minced
1 tbsp soy sauce
1 1/2 tsp turbinado sugar (aka “sugar in the raw”)
1/3 cup gochugaru
2 tbsp gochujang

In a large bowl, combine the bok choy, carrots and spring onions. Sprinkle with the salt and toss, massaging the veggies to ensure they are thoroughly salted. The bok choy should start to soften.

Add enough water to cover the veggies, then weigh them down with a plate and something heavy (like a glass of water). Let them sit for 1 hour, then drain, reserving and setting aside some of the brine. Rinse the veggies in a colander, let them drain for 15 minutes, and then return them to the bowl.

In a small bowl, combine the garlic, ginger, soy sauce, sugar, gochugaru and gochujang. Add to the veggies and mix, using gloved hands or a pair of tongs.

Pack the kimchi mixture into your fermentation vessel, pressing down firmly to eliminate air pockets. Top with some of the reserved brine — enough so that the veggies are just barely submerged. (The bok choy will release additional water during the fermentation process.) Cover with whatever weight and lid you’re using. Note: If you are not using an airlock mechanism, make sure your lid is loose enough to release the gas generated by fermentation.

Ferment at room temperature for at least 5 days, longer to taste. The kimchi should have a pleasant fermented odor — strong but not foul. Taste for doneness, then transfer to the refrigerator.

Pictured: Pyrex Gooseberry 444 Cinderella Mixing Bowl, Pyrex Yellow 404 Round Mixing Bowl, Pyrex Spring Blossom 442 Cinderella Mixing Bowl, Glasbake J2663 Handled Bowl

Spring Onion, Barley and White Bean Soup

What do you do when you have spring onions from the farmers market and a big bag of arugula from your neighbor’s garden? Well, I start thinking about soup, the swirl of greens in a hearty mix of beans and barley, and bacon. It’s hard to go wrong with ingredients like that! The soup is a meal in itself but would also be good served with garlic bread or a grilled cheese sandwich.

Recipe very loosely adapted from The New York TimesBarley and Spring Onion Soup With Fava Beans.

Serves 6

Ingredients

3 oz bacon, diced
1/2 lb spring onions, sliced (bulbs and stems)
2 garlic cloves, minced
6 cups low-sodium chicken broth
1 bay leaf
1 tsp dried thyme
2 cans cannellini beans, drained and rinsed
1/2 cup barley
5 oz arugula (or baby spinach)
salt
pepper

In a large pot over medium heat, saute the bacon until the fat renders and the edges start to brown. Add the spring onions and cook until they are slightly softened. Add the garlic and cook until fragrant, about 1 minute.

Add the chicken broth, bay leaf, thyme, beans and barley. Bring to a boil, then reduce heat and simmer until barley is tender, about 1 hour.

Stir in the arugula and cook until wilted and the soup starts to simmer again, about 3 minutes. Add salt and pepper to taste, and serve.

Pictured: Corning Ware Spice O’ Life A-5-B Saucepot, Pyrex Butterfly Gold 402 Round Mixing Bowl, Pyrex Spring Blossom 401 Round Mixing Bowl

7 Layer Chicken Chili and Cornbread Dip

A few years ago I came across a Food Network recipe for an eight-layer chicken chili dip and whipped it up for a Super Bowl party. It was fantastic, but so much work! It required a ton of chopping and prepping, and that got me thinking of ways to cut corners without sacrificing taste. For example, instead of dicing tomatoes, why not use pico de gallo salsa?

So for this year’s Super Bowl I’ve made the dip again, but with my own tweaks. I’ve swapped out ingredients for things that are easier to chop or don’t require chopping at all. And I’ve scaled up the recipe a bit to fit in a basic salad/mixing bowl. I’m pretty happy with the result! It’s still a little time consuming, but definitely easier than the original, and pretty tasty.

The dip is best served with a big spoon, so that you can scoop all the way through the layers, transfer to a plate and eat with tortilla chips.

Serves 16

Ingredients

2 tbsp vegetable oil
1 yellow onion, chopped fine
3 cloves garlic, minced
4 tbsp tomato paste
2 tbsp chili powder
3/4 tsp salt
1/4 tsp cayenne
1 1/2 cups low-sodium chicken broth
3 cups shredded rotisserie chicken (roughly 1 whole chicken)
1 1/2 cups sour cream
1 bunch chopped cilantro leaves and tender stems (about 1 1/2 cups)
zest of 2 limes plus about 1/4 cup juice
1 1/2 cups frozen corn, thawed
1 bunch green onion, chopped
2 heaping cups crumbled cornbread (about half a batch of cornbread from the Jiffy boxed mix)
1 16 oz container pico de gallo salsa, drained
1 14-oz can black beans, drained and rinsed
2 cups shredded Cheddar cheese

In a large skillet over medium high heat, saute the onions in the vegetable oil until translucent, about 5 minutes. Add the garlic and cook until fragrant, about 1 minute more. Stir in the tomato paste, chili powder, salt and cayenne, then add the chicken broth and simmer for about 3 minutes, stirring frequently. Add the shredded chicken and stir until well mixed. Set aside and allow to cool to room temperature.

In a medium bowl, combine the sour cream, cilantro, and lime zest and juice. In a separate bowl, stir together the corn and green onions.

In a straight-sided salad or mixing bowl, layer the dip in the following order: cornbread (tamped down gently), pico de gallo (use a slotted spoon so that you leave behind as much liquid as possible), black beans, cheese, cilantro-lime sour cream, chicken chili, corn and green onion mixture.

Chill, covered, for at least 1 hour or overnight. Serve with tortilla chips.

Pictured: Fire King Sunbeam Mixing Bowl, Corning Ware Spice O’ Life P-322 Square Cake Dish, Pyrex Spring Blossom 442 Cinderella Mixing Bowl, Pyrex 532 Measuring Cup, Assorted Pyrex Round and Cinderella Mixing Bowls

Rainbow Black-Eyed Pea Salad

I can’t think of a better way to ring in the new year than with a colorful, bright and tangy salad that doubles as a good-luck charm. Black-eyed peas are a symbol of luck and prosperity in the South and a traditional New Year’s Day dish (usually simmered with greens and served over rice).

Here I incorporated them in a chilled salad that can be made up to one day in advance, serves a crowd and is vegetarian-friendly — perfect for a New Year’s potluck. If you’re not a fan of black-eyed peas, you can substitute pretty much any kind of canned bean — navy beans or garbanzos (or both) would be good too. The vinaigrette is also great on its own as an all-purpose dressing.

Adapted from Bay Area Bites’ Healthy Black-Eyed Pea Salad.

Serves 12

Ingredients

4 15 1/2-oz cans black-eyed peas, drained and rinsed
1 red onion, chopped fine
1 red bell pepper, chopped fine
1 orange bell pepper, chopped fine
4 stalks celery, chopped fine
1 bunch green onions, chopped
1 cup chopped fresh parsley
zest and juice of 1 lemon
3 tbsp rice vinegar (unseasoned)
6 tbsp olive oil
2 tsp coarse-ground Dijon mustard
1 tsp sugar
salt
pepper

In a large bowl, stir together beans, red onion, bell peppers, celery, green onions, parsley and lemon zest.

In a separate bowl, whisk together lemon juice, rice vinegar, olive oil, mustard, sugar and a pinch of salt and pepper. Pour over the bean mixture.

Stir until combined, then cover and refrigerate at least 1 hour. Season with salt and pepper to taste before serving.

Pictured: Pyrex Yellow 404 Round Mixing Bowl, Pyrex Spring Blossom 401 Round Mixing Bowl

Thrifted Find: Pyrex Bake, Serve & Store Set

These versatile little casseroles are among my favorite — even must-have — Pyrex pieces. The Bake, Serve & Store Set came in three incremental sizes: 1 pint (model 471), 1 1/2 pint (472) and 1 quart (473). They’re great dishes for dips, small sides, leftovers … I’ve even heard of people using them for ice cream or cereal.

The Woodland 471 and 473 (on the right in the photo below) were two of my very first thrift store Pyrex finds — I couldn’t believe it when I saw them on the shelf at Hope Thrift. Then because I’m impatient, I bought the Woodland 472 on eBay to complete the set. I found the Spring Blossom set (on the left) on Goodwill’s online auction site — and since I was a beginner at the time, I didn’t pay attention to the model numbers and thought they were going to be larger casseroles. Lesson learned: Sense of scale can be way off in photos! I found a lot of the lids at Goodwill and Savers, which have typically been my best source of lids. Some of my current lids are chipped, so I am always on the lookout to swap them out for more pristine pieces.

img_2901

One of the nice things about the Bake, Serve & Store lids is that they can be inverted for easy stacking. The same is true for Pyrex refrigerator dishes. I can just imagine a mid-century refrigerator loaded with stacks and stacks of Pyrex!

Homemade Hot Chocolate Mix

The best thing about making your own hot chocolate mix is you have total control. You can go with whatever type of cocoa you like, use more or less sugar, add a favorite spice — the possibilities are endless. The basic ingredients are sugar, cocoa powder and salt, but I was inspired by Alton Brown’s Hot Cocoa Mix recipe to add a little cayenne. And it’s seriously good! It’s not enough to taste spicy, but adds a layer of flavor that really enhances the chocolate.


Ingredients

2 cups granulated sugar (baker’s sugar is nice because the grains are finer — but it’s not essential)
1 cup unsweetened cocoa powder
1 tsp salt
1 pinch cayenne

For the mix: Whisk all the ingredients together until well combined. The recipe can be scaled up to make a bigger batch if desired.

For making hot chocolate: In a small pot over low heat, whisk 2 tbsp of the mix into 1 cup of milk (or scale up in the same proportion) until hot and smooth. Don’t allow the milk to boil.

Extras:

  • Make a chocolate marshmallow latte: Decrease the sugar in the mix to 1 1/2 cups. When serving the hot chocolate, add enough marshmallows to form a foamy layer at the top of the mug.
  • Make it spicy: Increase the cayenne in the mix to 1/4 tsp (or more to taste).
  • Make it Mexican: Add 1 tsp ground cinnamon to the mix.
  • Make it boozy: Spike with your favorite liqueur (can’t go wrong with Baileys Irish Cream or Kahlua) or vodka.

Pictured: Pyrex Spring Blossom 442 Cinderella Mixing Bowl, Pyrex 508 Measuring Cup, Corning Ware Spice O’ Life P-81-B Menuette Saucepan, Corning Ware Snack-It Plate

Smoked Paprika Braised Beef Short Ribs

Smoked paprika is one of my favorite spices — it adds a layer of flavor that makes dishes seem more complex than they actually are. Since it’s a major ingredient in Spanish chorizo, it can also make vegetarian dishes taste meaty without the meat — it’s great in braised winter greens, for example. It would also be nice in homemade mac & cheese.

In this dish it brings a smoky deliciousness to another food I’m obsessing over lately: beef short ribs. You could use basic stew meat instead (3 pounds), but the bone-in ribs produce a rich, flavorful sauce that really can’t be beat. Serve over rice, polenta or mashed potatoes.

Adapted from The New York Times’ Beef Stew with Sweet and Hot Paprika.

Serves 6

Ingredients

4 pounds bone-in beef short ribs (English style, cut in 3-inch chunks)
1/2 cup olive oil
3 tbsp Spanish smoked paprika
kosher salt
pepper
1 sprig rosemary
1 bay leaf
3 large onions, roughly chopped
4 carrots, peeled and cut in 2-inch chunks
3 cloves garlic, minced
1-2 cups dry red wine
2 tsp ground cumin
1 tsp dried marjoram
1/4 tsp cayenne
grated zest of 1 lemon
1 14 1/2 can diced tomatoes, with their juice

Combine 1/4 cup olive oil and 1 tbsp smoked paprika. Rub the mixture all over the meat, and sprinkle with kosher salt and pepper. Marinate in a large, covered bowl for at least 2 hours, preferably overnight.

In a large skillet over medium high heat, heat up 2 tbsp of olive oil and brown the meat in small batches (avoid overcrowding). Add more oil as needed. Transfer the meat to a 5-to 6-quart dutch oven as you go. Add the carrots, bay leaf and rosemary to the dutch oven about halfway through.

Lower heat to medium. If you have a lot of charred spices in the skillet, remove by wiping with damp paper towels. Then add the remaining olive oil and onions and saute until translucent, about 5 minutes. Add the garlic and saute until fragrant, about 1 minute more. Season with salt and pepper to taste. Stir in 2 tbsp smoked paprika along with the cumin, marjoram, cayenne and lemon zest.

Add wine and simmer for a minute, stir in diced tomatoes and then transfer everything to the dutch oven.

Bring to a boil, then lower heat and simmer, covered, until the meat is tender, about 3 hours. Remove the meat and set aside, covered with foil to keep warm. Skim most of the fat from the sauce and then simmer about 10 minutes more to reduce a little. Add the meat back in and simmer another couple minutes, then serve.

Pictured: Pyrex Spring Blossom 2 403 Round Mixing Bowl; Pyrex Spring Blossom 402 Round Mixing Bowl; Corning Ware French White F-15-B Oval Casserole; Corning Ware Blue Cornflower P-10-B Square Skillet

7 Must-Have Pyrex and Corning Ware Dishes

Much as I would love to collect every piece of vintage kitchenware that I come across, space constraints demand a more practical approach. I try to buy things that I will actually cook with, and if they have multiple uses, even better. Of course, I must admit I own more ovenware than any one person really needs, because I also collect dishes that interest me or that have a pattern I haven’t seen before. I’ll get around to using it all … eventually!

That got me thinking about which pieces I really couldn’t live without. I managed to narrow the list down to seven items that get the most use in my kitchen:

img_2637

Pyrex 404 Round Mixing Bowl (pictured in Verde)
This is the largest of the nested mixing bowls (4 quarts) — perfect for batters and doughs. It’s also a nice size for serving salads, rolls, chips, etc. Plus it’s ovenware, so you could totally bake a casserole in it.

img_2635

Pyrex 024 Round Casserole (pictured in Holiday Casserole)
I’ve used this shallower bowl (2 quarts) for marinating chicken, as a serving piece, for storing leftovers in the fridge, and for baking casseroles. Plus: It seems fairly easy to find lids in this size.

img_2632

Pyrex 472 Round Casserole (pictured in Spring Blossom)
This is my favorite size (1 1/2 quarts) for hot or cold party dips, or small side dishes like cranberry sauce. You could also eat out of it.

img_2634

Corning Ware A-5-B Saucepot (pictured in Spice O’Life)
This is Corning Ware’s largest pot (5 liters), great for soups, chili, roasts and the like.

img_2638

Corning Ware A-10-B Skillet (pictured in Pastel Bouquet)
This one shares the same lid with the A-5-B, which is handy. I’ve put it to use as a frying pan, for braising meats in the oven and as a baking dish.

img_2633

Corning Ware A-3-B Casserole (pictured in Country Festival)
This holds about the same amount as a 13x9x2 pan (3 quarts; the conversion works better for casseroles than for cakes). It’s an all-around nice size for cooking and serving.

img_2640

Corning Ware Grab-It Bowls (I’ve only ever found these in white, although some patterned versions do exist)
These make great everyday tableware — for cereal, soup, salad, etc — but they are also a perfect size (15 oz) for individual casseroles like pot pie. And being Corning Ware, they can go under the broiler, in the freezer and everywhere in between. How can you beat a cereal bowl that you can also put on the stovetop to heat up soup, melt butter or fry an egg? Grab-Its also have both glass and rubber lids available, making them handy for storing single-serving leftovers.

Roasted Carrots and Potatoes with Carrot Top Pesto

For a few Saturdays in a row, I’ve watched people flock to the carrots in the vegetable booth at our neighborhood farmers’ market — brilliant orange specimens, stubby, with a ton a fresh leafy greens attached. So this weekend, I bought them too. It was the perfect opportunity to make the carrot top pesto I’d seen in a Bon Appetit recipe, which I’ve adapted here.

Serves 4-6

Ingredients

1-2 lbs carrots with tops, trimmed and peeled
1 lb russet potatoes, partially peeled (about 2 large)
1/4 cup plus 2 tbsp olive oil
salt
pepper
1/4 cup (packed) fresh basil
1/4 cup (packed) fresh parsley
1 garlic clove, minced
1/4 cup grated Parmesan cheese

Preheat oven to 450 degrees. Move a rack to the top third of the oven.

Cut the potatoes into half-inch slices. If your carrots are skinny, cut into 2- to 3-inch chunks; if they are fat, cut on the diagonal into half-inch slices. Toss in 2 tbsp olive oil and spread out in an even layer on a baking sheet.

Roast until the carrots and potatoes are tender and browned, about 30-40 minutes.

In a food processor, combine 1 cup (packed) of the carrot tops (leaves and tender stems only), basil, parsley, garlic, Parmesan and 1/4 cup olive oil. Pulse until you have a coarse puree. Season with salt and pepper.

Let the carrots and potatoes cool slightly, then toss with the pesto and serve.

Pictured: Glasbake Vegetable Medley J2024 Rectangular Baking Dish, Pyrex Spring Blossom 043 Oval Casserole

Pickle & Cheese Party Spread

This pickle-infused cheese spread was inspired by the old-fashioned cheese ball — and more specifically, this dill pickle cheese ball from Delish. I’ve modified the recipe slightly to serve in a casserole dish — because while cheese balls are retro cool, Pyrex is prettier.

The recipe makes enough for a party; for a smaller group, a half batch will do. Note: I made the bacon optional because while it’s visually appealing, I don’t think it adds that much to the flavor of the spread. The bacon loses its crunch pretty quickly in the refrigerator, so if you’re making the dish ahead of time, it may be better to omit.

Ingredients

2 8-oz blocks cream cheese
1 1/2 cups sharp cheddar cheese, shredded
1 cup mozzarella, shredded
3 tbsp fresh dill, chopped fine
1 tsp garlic powder
1 tsp paprika
1/2 cup dill pickles, chopped fine (about 3 whole baby dills)
1 tbsp pickle juice
salt
pepper
6-8 slices cooked bacon, chopped fine (optional)

Set cream cheese out to bring to room temperature. If desired, chop the cheddar and mozzarella into finer pieces.

In a large bowl, combine 1 cup of the cheddar with the mozzarella, garlic powder, paprika and 1 tbsp of the dill, and stir until mixed. Stir in the pickles and pickle juice. Add the cream cheese and stir until thoroughly incorporated. Season to taste with salt and pepper.

Spoon the mixture into a small casserole dish and spread around in an even layer. Refrigerate for at least 2 hours.

For the topping, combine the bacon with 1/4-1/2 cup cheddar and 1-2 tbsp dill (amount depends on the diameter of your casserole dish — if it’s large like a pie plate, use more; if it’s small like a ramekin, use less). Sprinkle the topping over the spread and serve.

Pictured: Pyrex Spring Blossom 472 Cinderella Round Casserole, Pyrex Spring Blossom 503 Refrigerator Dish, Pyrex Spring Blossom 443 Cinderella Mixing Bowl, Pyrex Spring Blossom 401 Round Mixing Bowl, Corning Ware P-185-B Snack-It Plate