Thanksgiving Dinner 2017

I love cooking for Thanksgiving, but I love planning the cooking even more: looking for recipes, thinking about logistics, choosing the right dishes, coming up with a schedule, etc. I think I like cooking projects more than the cooking itself.

So when I saw this article on The Kitchn about organizing serving dishes for Thanksgiving, I knew I wanted to do something similar. I had already been thinking about setting out my vintage cookware in preparation for the big day, but now I needed to take pictures.

I think this will be a new tradition for me, documenting the mix of dishes I use for holiday meals. For this Thanksgiving, I am going with a variety of greens and floral designs, drawn from my favorite Pyrex and Corning Ware patterns.

Pictured: Corning Ware Floral Bouquet Third Edition A-3-B Casserole, Corning Ware Floral Bouquet Third Edition P-43-B Petite Pan, Fire King Gravy Boat, Pyrex Lime 024 Round Casserole, Pyrex Verde 403 Round Mixing Bowl, Pyrex Spring Blossom 045 Oval Casserole, Pyrex Spring Blossom 043 Oval Casserole, Pyrex Spring Blossom 72 Butter Dish, Pyrex Spring Blossom Pitcher

Free Printable Thanksgiving Menu

Inspired by Fire King’s Gingham Garden pattern, this printable menu template will bring some vintage charm to your Thanksgiving table. The text is editable so you can add, subtract or change categories as needed. Here’s a closer look with and without menu items (yes, that’s pretty much our actual Thanksgiving menu this year — no turkey!):

Download the Word document here: Thrifted Kitchen Thanksgiving Menu Template. Enjoy!

Pictured: Pyrex Woodland 77 Gravy Server with Saucer

Thrifted Find: Salton Cosmopolitan Casserole

Straight out of 1973, the Salton Cosmopolitan Casserole was the product of a collaboration between Salton Inc. and Corning Glass Works. The dish was sometimes stamped Salton and sometimes Pyrex (mine, which I scored from Goodwill online, says Salton), but it’s clearly made from a Pyrex mold — the 475 Cinderella Round Casserole. There are some interesting details about the history of Salton and Pyrex on the Corning Museum of Glass Pyrex Potluck site here.

The casserole was originally sold as a set with a square electric hot plate — you can see a photo from the Corning Museum of Glass collection here. In fact, the Salton company was primarily known for its hot plates, food warmers and other small appliances. My research into the subject brought back a childhood memory of a Salton electric bun warmer my parents used to bring out for keeping muffins and biscuits hot at the breakfast table. It was a sort of rectangular box with curved sides and a cloth-covered, hinged lid. It seems that various versions of it can be had on eBay for about $30, but I will hold out for the brown polka dot design I remember.

In addition to the bun warmer discovery, I came across a charming 1975 New York Times article about company founder Lewis Salton:

And wouldn’t you have it, the Salton peanut butter machine is available on eBay too! Luckily for my sanity and cabinet space, I’m not into collecting appliances. But if I see that bun warmer in a thrift store someday, I’m not making any promises.


Thrifted Find: Corning Ware Buffet Server

The clean lines … the stylish knob … the black-and-white design … how could I resist this little dish that looks like it’s straight out of Mad Men? The Corning Ware Buffet Servers were made in the ’60s, notable for their round shape, pyroceram lid and bakelite knob. Just like all Corning Ware, they can go from freezer to oven, over a flame, etc., but with more pizzazz! I snagged this 2 1/2 quart model at Savers — the lid in particular is in great condition, making it a lucky find.

Incidentally this dish also goes with the P-201-HG handles I wrote about last month. I love putting all the pieces together! More information about Buffet Servers is available on the Corning Ware 411 blog here and here.

Chicken, Sausage and Rice Gumbo with Collard Greens

I hesitate to call this dish gumbo because the term is so loaded with a specific food culture. My version is probably not “authentic” — but it’s delicious and hey, I can make gumbo however I want! I think of it sort of as a gumbo soup — hearty but not too thick in the broth department, full of Cajun flavors and with rice and greens mixed right in.

The spice level here is medium to hot — to me that’s zesty but not mouth-on-fire hot. You could cut the red pepper flakes to go milder, or add cayenne to go hotter. Also, if you prefer a thicker stew, you could double the butter and flour.

Serves 8-10

Ingredients

1 lb andouille sausage, sliced
2 tbsp butter
1/4 cup all-purpose flour
1 medium onion, chopped
1 medium green bell pepper, diced
3 celery stalks, chopped
3 carrots, chopped
3 cloves garlic, minced
2 14 1/2-oz cans diced tomatoes (undrained)
6 cups low-sodium chicken broth
1 tbsp dried thyme
1 tsp red pepper flakes
1 tsp smoked paprika
2 bay leaves
1 1/2 lbs boneless skinless chicken breasts
2 10-oz bags cleaned and cut collard greens
4 cups cooked brown rice
2 tsp ground gumbo file
salt to taste

In a large dutch oven, saute the sausage over medium heat until browned and the fat begins to render. Remove the sausage and set aside, leaving the drippings in the pan.

Lower the heat slightly, add the butter and stir until melted. Sprinkle in the flour and stir with a whisk until incorporated. Continue stirring constantly and cook until caramel in color, about 15-20 minutes (actual time can vary quite a bit; let the roux get as dark as you want, being careful not to burn).

Add the onions, bell peppers, carrots, celery and garlic and stir until coated in the roux. Add the diced tomatoes and deglaze, scraping up and stirring in the browned bits on the bottom of the pan. Add chicken broth, thyme, red pepper flakes, smoked paprika and bay leaves. Bring to a boil.

Add the chicken and lower to a simmer. Cover and cook until the chicken is no longer pink in the middle, about 20 minutes. Remove chicken and shred or chop into small pieces, set aside.

Add the collard greens and stir until wilted. Cover and simmer until the greens are tender, about 40 minutes.

Add the gumbo file, sausage, chicken, rice and salt and simmer for a minute, then serve.

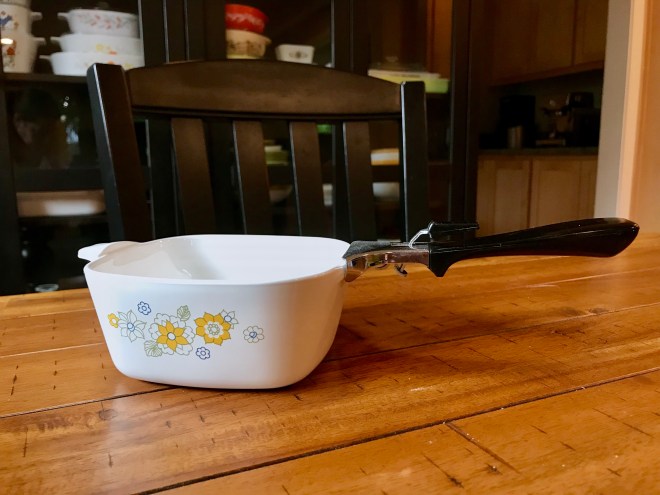
Pictured: Pyrex Spring Blossom 443 Cinderella Mixing Bowl, Corning Ware Floral Bouquet Third Edition P-43-B Petite Pan, Corning Ware Wildflower P-43-B Petite Pan, Corning Ware Fresh Cut P-43-B Petite Pan, Corning Ware Fruit Basket P-43-B Petite Pan 


Thrifted Find: Corning Ware Petite Pans

Corning Ware’s personal-sized casserole dishes, called Petite Pans, are one of my favorite things to collect. I see them pretty often at the thrift stores I frequent (Goodwill, Savers, Hope Thrift), and I’ve splurged on a couple harder-to-find patterns on eBay. The P-43-B is the best size in my opinion (22 ounces), perfect for pot pies, french onion soup, individual lasagnas and more. I love the variety of patterns, and it’s handy that the pans nest easily and don’t take up much space.

There is also a 12-oz size, the P-41-B, which is really cute (I’ve only ever found it in the Blue Cornflower pattern):

img_2276

The Petite Pans can morph from casserole to mini skillet with their own special detachable handle:

img_2279

They have glass lids too, but I haven’t managed to get my hands on one yet. There are also plastic lids for fridge/freezer storage — perfect for freezing single-serving leftovers. Which brings me to one of the biggest reasons Corning Ware is so amazing: It can cook on the stove top, in the oven and under the broiler, then go into the freezer, then go straight from freezer to stove/oven again. And the microwave, for that matter. Try that with any other ceramic or glass dish, and you’ll be left with a pile of shards and a big mess!

Chicken and Black Bean Enchiladas

It’s surprisingly easy and fast to make red enchilada sauce from scratch, and it tastes so much better than the canned stuff. We typically have all the ingredients already, and I love being able to whip something up out of the pantry. Plus, you can make it as spicy as you want! If I were not feeding a 5-year-old, I would probably double down on the chipotle.

In the spirit of cooking whatever you happen to have on hand, it’s also easy to experiment with the enchilada filling. Sauteed mushrooms, leeks or zucchini would be yummy, or you could throw in some black olives or corn. Ground beef or turkey would also work.

Note: If you don’t have precooked chicken, you can simmer a boneless chicken breast in the sauce until cooked through (about 15-20 minutes), then shred or chop into small pieces.

Serves 6

img_2263

Ingredients

1 small yellow onion, chopped
3 cloves garlic, roughly chopped
1 15 oz can tomato sauce
1 14 1/2-oz can low sodium chicken broth
3 tbsp chili powder
1 tbsp ground cumin
1 tsp dried oregano
1/2 tsp ground chipotle
1 tsp salt
1 tbsp olive oil
8 oz cooked chicken, chopped or shredded (see note above)
1 15 1/2-oz can black beans, drained and rinsed
1 tsp masa harina (see my note about masa here)
cooking spray
12 medium corn tortillas
16 oz shredded cheese (Mexican blend)
3 green onions, chopped

For the sauce: In a small pot, combine 1/2 cup of the chopped onions, garlic, tomato sauce, chicken broth, chili powder, cumin, oregano, chipotle and salt. Pulse with an immersion blender until smooth (or do this in a regular blender). Bring to a boil, then simmer for about 10 minutes.

For the filling: In a large skillet over medium-high heat, saute the rest of the onions until translucent, about 5 minutes. Lower the heat to low and add chicken, black beans and 1/2 cup of the sauce; stir until everything is coated and hot. Sprinkle in the masa and stir until absorbed. Season to taste with salt and pepper.

For the assembly: Preheat oven to 350 degrees. Spray two 13×9 pans (or equivalent) lightly with cooking oil. Pour about 1/4 cup of the sauce into each pan and spread to coat the bottom. Heat up the tortillas in the microwave (this helps keep them from tearing).

Spoon the filling into each tortilla in a line down the middle, and add a generous sprinkle of cheese. Roll up gently and place in the pan, seam side down. When the pans are full, pour the rest of the sauce over the tortillas and top with the rest of the cheese.

Bake uncovered until the cheese is melted and lightly browned, about 20 minutes. Garnish with chopped green onions.

Pictured: Corning Ware Green Macrame P-332 Roaster, Corning Ware Blue Cornflower P-332 Roaster

Best Pyrex Stacking Ideas

Vintage Pyrex is so pretty, it’s a shame to store it inside a kitchen cabinet. Instead, collectors often arrange their wares on open shelves, carts or hutches using a technique designed to show off each individual piece: stacking.

My own stacking preference is a mix of form and function: I want to be able to see and enjoy the patterns and colors, but I also want easy access so that the items in my collection are actually usable for cooking. So, precarious towers of Pyrex are not my thing. Another consideration: preventing rattles and other noises.

One fun thing about stacking is that it gives you an opportunity to mix and match complementary pieces. Recently I finally acquired enough round mixing bowls to put together my own custom set: (from top to bottom) Spring Blossom (x2), Spring Blossom 2, Verde.

img_2246

Since the mixers are nested bowls, you need a little something between each one to lift it up and make the pattern visible (I used folded sheets of bubble wrap). There are lots of ways to do this for different sizes and shapes of Pyrex, so here I have gathered the best ideas I’ve seen on the internet, on social media and in collector groups:

  • packing peanuts
  • bubble wrap
  • Ziplock containers
  • ramekins
  • bags of rice, beans, popcorn, etc.
  • empty packing tape rolls
  • inverted lids
  • glass tumblers
  • cheap plastic bowls
  • Jell-O boxes
  • chunks of lumber
  • slices of pool noodles
  • tuna cans (or similar)
  • berry baskets
  • paper bowls
  • small plastic food containers (e.g., sour cream, margarine, yogurt, deli containers)
  • cut up egg containers
  • squares of non-skid rug protector (for stability)
  • styrofoam blocks
  • floral foam blocks
  • old washclothes
  • canning rings
  • plastic coffee cup lids

Of course, these methods can work for any kind of vintage kitchenware, not just Pyrex. Corning Ware, for example, stacks really easily on inverted lids. Over the weekend we installed some new shelves to house my collection, so stacking all kinds of dishes has been on my mind.

Thrifted Find: Glasbake Casseroles

There’s something about Glasbake — the patterns are so cheery and bright, yet mysterious, as they often don’t have a name. I see it a lot in thrift stores, but only buy the patterns that strike my fancy. These two seem to go by generic descriptions: blue (or teal or turquoise) fruit and yellow daisy (or possibly daisy days). I believe both designs came in other colors too. They were quite the find at Goodwill, near-mint condition with lids.

Whole Wheat Buttermilk Cornbread

With Thanksgiving around the corner, I’ve been thinking about cornbread — and more specifically, cornbread stuffing. Cook’s Illustrated has a great cornbread stuffing recipe that I tried a few years ago, and this time around I’m curious about making a whole wheat version. My first step: testing out a whole wheat cornbread recipe.

The whole wheat flour gives this cornbread an earthiness that’s especially tasty topped with good local honey. I’ll definitely be making it again for cornbread stuffing next month.

Adapted from Cook’s Illustrated‘s Golden Cornbread for Stuffing (The New Best Recipe, America’s Test Kitchen 2004)

Ingredients

3 eggs
1 cup buttermilk
1 cup milk
1 1/2 cups yellow cornmeal
1 1/2 cups whole wheat flour
1 tbsp baking powder
3/4 tsp baking soda
4 tsp sugar
3/4 tsp salt
3 tbsp unsalted butter, melted

Preheat oven to 375 degrees. Grease a 13×9 baking dish (or equivalent — I used two 8-inch square dishes).

Whisk together dry ingredients in a large bowl. Whisk eggs, buttermilk and milk in a separate bowl. Pour the egg/milk mixture into the dry ingredients and stir until just combined. Stir in melted butter.

Pour the batter into the baking dish and bake until the top is cracked and golden and edges are pulling away from the sides, about 30-40 minutes.

Place the baking dish on a wire rack to cool for at least 1 hour before serving.

Pictured: Corning Ware Floral Bouquet Third Edition A-2-B Casserole (x2), Corning Ware Spice O’ Life P-81-B Menuette Saucepan, Pyrex 532 Measuring Cup, Pyrex Butterfly Gold 404 Round Mixing Bowl